Contents
How to align a burner pipe
GUIDE LINES
TO DOWNLOAD THIS GUIDE AND ALL OTHER PRACTICAL GUIDES WHICH YOU CAN USE IT IMMEDIATELY PLEASE CLICK HERE
Objectives
To avoid that the flame licks:
- Either the material in the zone with the risk of local formation of CO and thus volatilization of sulphates
- Either the walls with the risk of destroying coating and refractory
Actions
A1 Specific tools (Laser and laser safety glasses )
A2 Center the burner pipe
A3 Center the laser beam
A4 Align the burner pipe in kiln axis
A5 Start up
A6 Other
Laser alignment
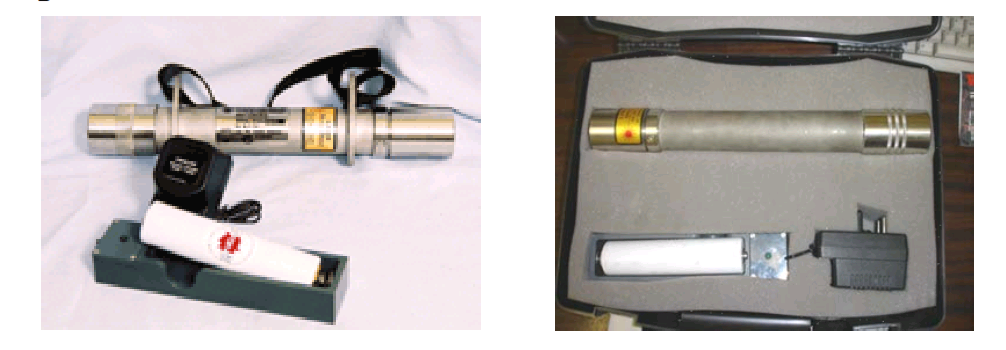
Lightweight, self-contained, alignment laser which provides a highly visible spot of light up to a range of 300 m.
Technical Information:
Type SK083
Laser Type: Class llla laser (equivalent in brightness to a He-Ne laser)
Spot Size: + – 20mm at 100m
Accuracy: Factory aligned to within 5mm at 100m Battery Life: In Excess of 18 hours :
Charging System: 220 Volt transformer-type charger Dimensions: Length 390mm, diameter 55mm
Mass: 3kg (includes battery pack)
Casing Material: Stainless Steel
On/Off Switch: Push on/off fitting
Marketed by KWIKMARK Po Box 15355 Fararmere 1518 South Africa
Laser safety glasses
It’s mandatory to protect the eyes with special safety glasses
Laser can emit different wave
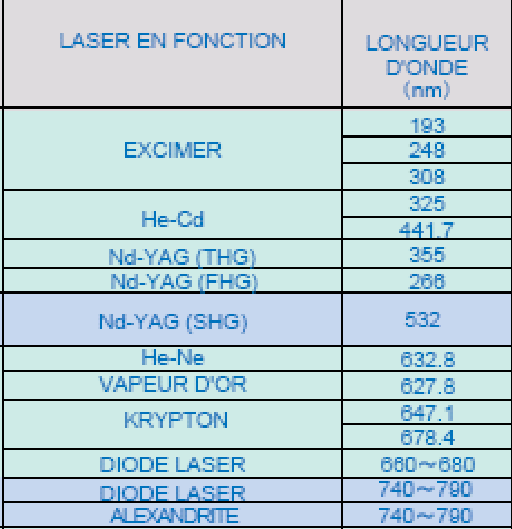
First identify:
- Laser beam power
- Laser wave Length
Specify that you want to see the laser beam behind glasses.
Depending on your laser characteristics, your safety manager will provide you adequate laser glasses with appropriate filters
Recommendations
- Insert the burner pipe into the kiln with the kiln doors open.
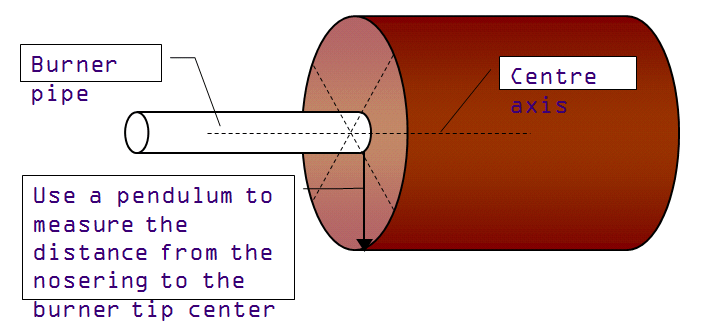
- Ensure that the burner pipe is set at the desired distance into the kiln. Measure the distance of the burner tip into the kiln.
The kiln expansion must be taken into account to determine the exact position of the burner pipe into the kiln, as recommended by supplier and/or technical centre. (For high momentum burners , there is a risk of liquid over the nose ring if the burner is too far out = hot & sticky material on fixed grate cooler enhances snowman formation) - Ensure the tip of the burner is correctly centred with the kiln centre. Therefore measure
- Ensure the tip of the burner is correctly centred with the kiln centre. Therefore measure the distances from the centre of the burner to the kiln refractory on two perpendicular lines.
- Once the burner pipe is set, hook up the axial, swirl and transport air lines
- When all lines have been installed the kiln hood doors can be closeD
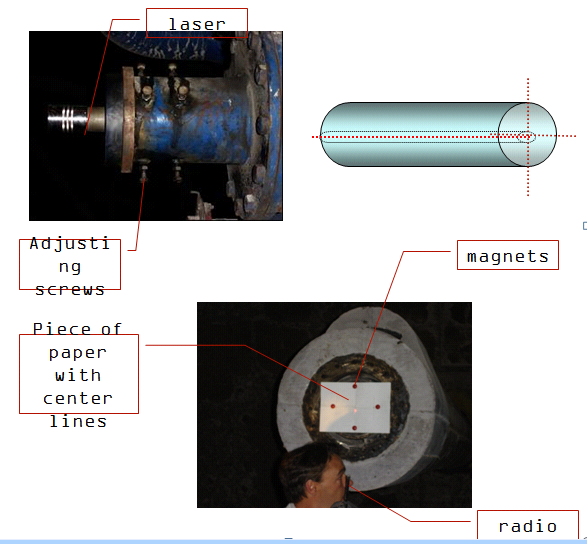
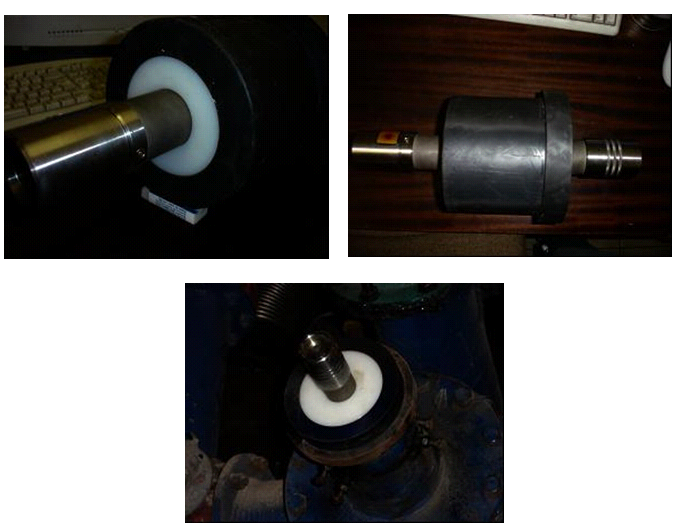
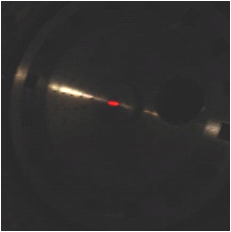
- When the hood doors are closed and secure, insert a laser into the centre of the burner pipe (opposite burner pipe tip).
- Make sure that the laser is set in the centre of the burner pipe. This is accomplished by using an insert a bit smaller than the jacket tube diameter, that fits into the centre burner channel and holds the laser.
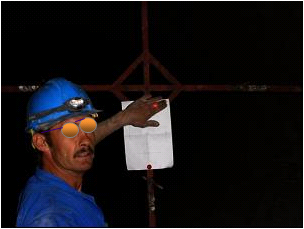
- With one person outside of the kiln and one inside, through radio contact, make the necessary adjustments on the laser support in order to align the laser beam in the centre of the burner tip
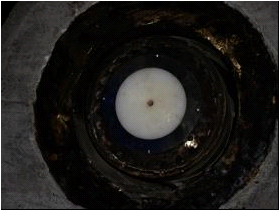
- Install a telescopic cross (segments of equal length) in the calcination zone of the kiln (free of build-ups or rings)
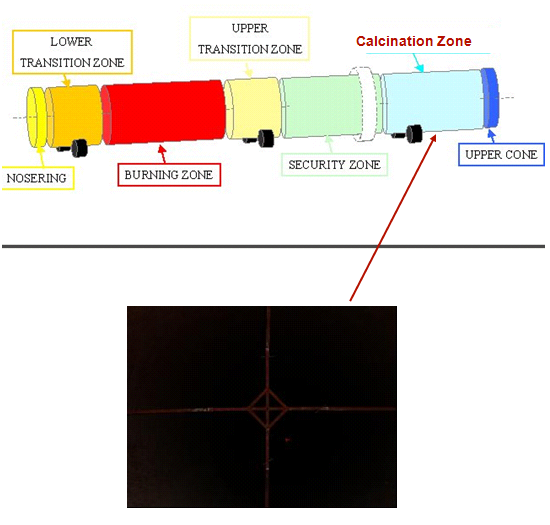
- Through radio contact make the necessary adjustments on the burner pipe carriage so that the laser beam hits the centre of the cross.
While making the adjustments on the carriage, monitor the position of the burner pipe tip to make sure it stays at the centre of the kiln.
Once the point have been met, it is important that there is no further movement of the burner pipe prior to start up.
- After start up: visually monitor the flame and make sure it is well adjusted. The flame must not touch the bricks or the material bed.
- Flame must be:
- Sharp
- Narrow
- Strong
- Attached to the burner (30 cm black plume)
- Such that not licks neither the bricks nor the clinker bed
- Make any further corrections if necessary during kiln operation.
- Record all adjustments in a process log file.
Sometimes the jacket tube inside the burner pipe is not straight. Therefore it is important to place the laser at tip of the burner as opposed to the feed end.
Perfect, thank you dear