Quick engineering answer
Bucket-elevator chain inspection should combine measured pitch elongation, chain and sprocket contact, alignment, take-up symmetry, joint freedom, bucket attachments and casing rub marks. Do not replace chain based on take-up travel or one visual symptom alone; find the wear mechanism so a new chain does not inherit the same failure.
1. Establish a Safe Inspection Condition
Empty the elevator as far as the design permits, isolate all energy sources and secure the chain/bucket assembly according to the equipment manufacturer’s procedure. Never rely on a backstop or drive brake as the only means of securing a loaded chain.
Measure Chain Elongation Correctly
Chain wear increases pitch as pins and bushings wear. Measure a sufficiently long section under a consistent light tension, then compare the measured length with the nominal length for the same number of pitches. Using a longer measurement span reduces local measurement error and gives a better indication of cumulative joint wear.
Use the chain manufacturer’s allowable wear limit for the specific chain. Do not apply one universal replacement percentage to every elevator design.
Inspect Sprockets, Return Wheels and Bucket Attachments
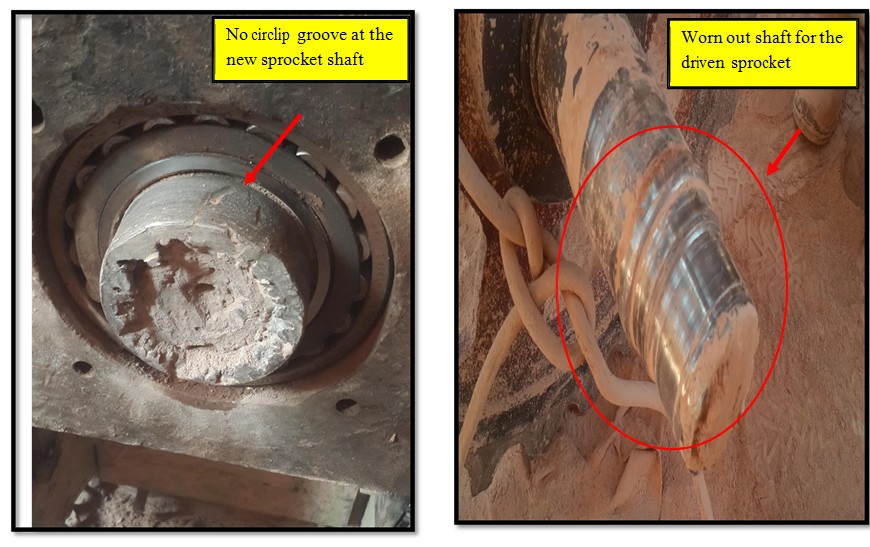
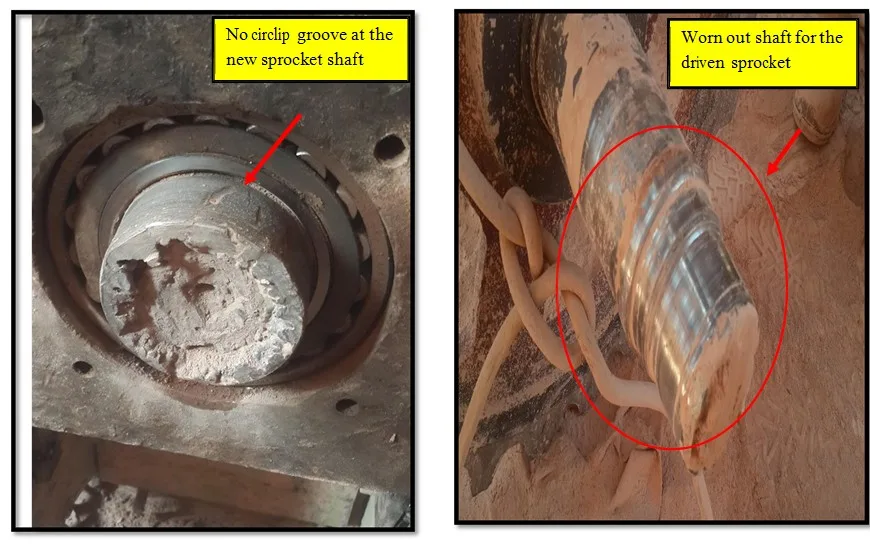
New chain installed on badly worn sprockets can develop abnormal wear quickly. Inspect teeth or traction surfaces for hooking, uneven contact, broken teeth, material buildup and evidence that only part of the bushing surface is carrying load. Also inspect bucket bolts, chain attachments, bucket deformation and casing clearance. A loose or damaged bucket can impose repeated shock or side loading and may be the real cause of recurring chain problems.
Read the Wear Pattern Before Replacing Parts
| Finding | Likely interpretation | Next check |
|---|---|---|
| Side marks on link plates | Possible sprocket or shaft misalignment | Head/boot shaft, sprocket position and bearings |
| Uneven bushing wear | Worn or misaligned wheel / poor contact pattern | Wheel condition and contact across the chain |
| Excessive lateral play | Pin or joint damage | Pins, bushings, holes and connecting links |
| Different take-up positions | Skew, unequal wear or adjustment problem | Boot shaft, guides and take-up mechanism |
| Repeated stiff joints | Contamination, deformation or lubrication issue | Joint freedom, dust ingress and operating environment |
Use a Repeatable Shutdown Inspection Sheet
Use the same inspection points every shutdown so the maintenance team compares like-for-like conditions instead of relying on memory. Record elongation, left/right take-up position, unusual wear locations, replaced pins or links, sprocket condition and bucket-attachment defects. Trending is more useful than a single snapshot because it shows whether wear is stable or accelerating.
Make the Replacement Decision from Combined Evidence
Do not base the replacement decision on one visual symptom. Combine measured elongation, remaining take-up travel, pin-and-bushing condition, link-plate integrity, sprocket wear and alignment evidence. If wear is accelerating between inspections, investigate misalignment, contamination, poor contact pattern, overload or damaged buckets before installing new chain. Otherwise the replacement chain can inherit the same failure mechanism.