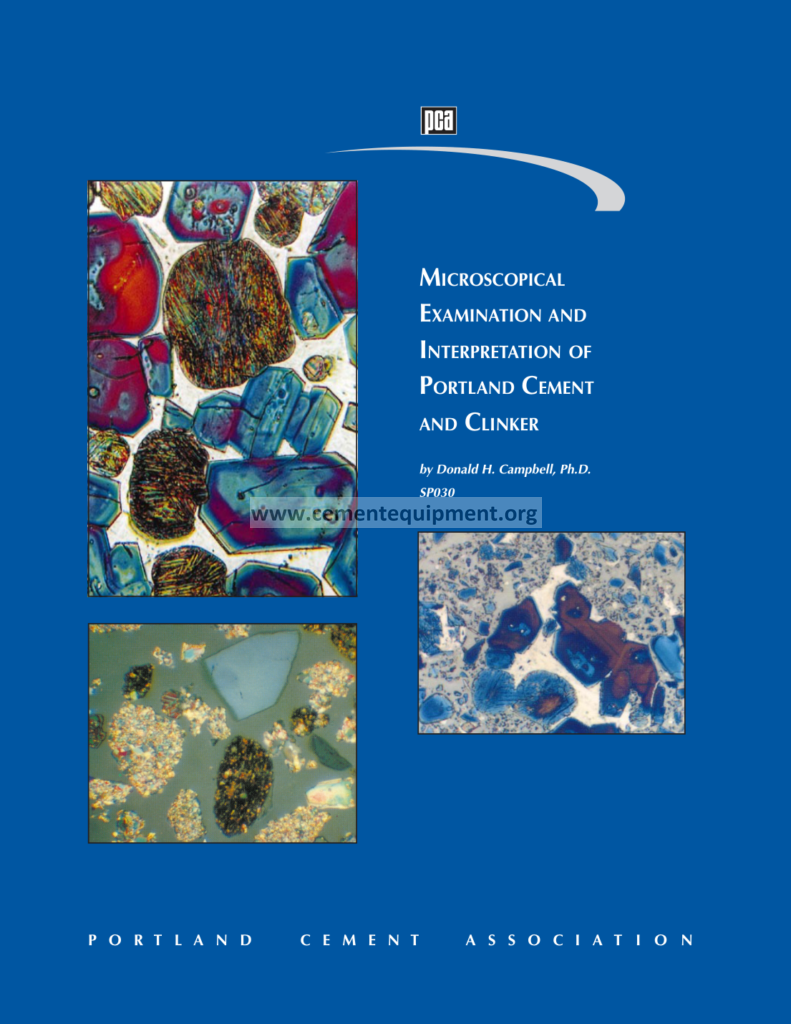
Microscopical Examination And: Complete Technical Guide
The microscopical examination of the clinker and the cement is the window into the microstructure of the product: the clinker is a crystalline material, and its properties are written in the crystals: the size of the alite, the shape of the belite, the distribution of the interstitial melt and the state of the free lime tell the burning history of the kiln and the future behavior of the cement: the microscopist reads the clinker as the doctor reads the X-ray: the reflected light microscope, the polished section and the trained eye reveal what the chemical analysis cannot: the chemistry says what is there, and the microscope says how it was made.
The Complete Cement Technical Package (931 files including the books, the courses, the Excel tools and the presentations: $249.99 one-time: instant download via the PayPal payment) includes the microscopy documentation: the sample preparation guides, the phase identification charts, the point counting methods and the interpretation tables: this article walks the reader through the microscopy discipline: the preparation, the phases, the quantification, the interpretation and the troubleshooting: the engineer and the laboratory technician close the page with the working map of the clinker microstructure.
The clinker hides nothing from the microscope: the too-hot firing grows the bloated alite, the too-cold firing leaves the ragged alite and the raw lime, the reduction stains the interstitial phase, and the alkali cycles print their signature on the sulfate distribution: the microscope is the honest witness of the kiln operation, and the good laboratory treats it as the complement of the X-ray fluorescence: this page presents the examination as the laboratory practice: step by step, phase by phase, from the polished section to the report.
1. The Purpose of the Clinker Microscopy: What the Examination Answers
The microscopical examination of the clinker serves the plant with the answers the chemistry alone cannot give:
- The burning degree: the size and the form of the alite crystals, the rim of the belite and the distribution of the interstitial phase: the microscope reads the temperature and the residence time of the burning zone: the burning degree is the first question of the examination;
- The cooling rate: the state of the aluminate and the ferrite, the crystallization of the interstitial phase: the fast-cooled clinker shows the glassy, finely crystallized interstitial phase, the slow-cooled one the coarse crystals: the microscope reads the cooling history of the cooler;
- The reducing conditions: the reduction of the iron in the ferrite phase darkens the interstitial material: the reducing clinker shows the characteristic “brown” or “black” discoloration of the ferrite: the microscope confirms what the color of the sample hinted;
- The raw mix deficiencies: the excess free lime (the raw, unreacted CaO), the coarse quartz relics, the under-burned belite nests: the microscope identifies the component that the chemistry balance missed: the diagnosis of the raw material problems;
- The minor components: the alkali sulfates, the free magnesia (the periclase), the phosphates and the other minors: the microscope locates the phases that the X-ray diffraction may overlook: the minor phases are the fingerprints of the chemistry and the fuels;
- The trouble-shooting link: the abnormal setting, the strength shortfalls, the storage problems: the microscopical examination of the suspect clinker or the suspect cement finds the cause in the microstructure: the investigation of the quality complaints ends at the microscope;
The purpose of the microscopy is the diagnosis: the chemical analysis quantifies the oxides, and the microscope explains the behavior: the clinker that shows the bloated alite and the periclase explains the unsound cement; the clinker with the massive belite nests explains the slow strength; the examination is the bridge between the burning and the performance: the plant that looks into its clinker sees the causes of its problems and the reasons for its successes: the microscope is the diagnostic instrument of the clinker quality.
2. The Sample Preparation: The Polished Sections and the Etchants
The quality of the examination begins at the preparation bench: the polished section is the window through which the light enters the clinker, and the window must be clean, flat and representative:
- The sampling: the clinker sample from the cooler discharge, quenched and dried: the sample of the 100 to 500 grams, reduced to the representative subsamples: the clinker lumps are the random collection of the heterogeneous material: the sampling is the first honesty of the examination;
- The specimen mounting: the selected clinker fragments (3 to 8 millimeters) are embedded in the thermosetting or the cold-curing resin: the mounted specimens of the representative fragments, sometimes several fragments in one mount: the mount is the handle of the examination;
- The grinding: the mounted specimen is ground on the successive silicon carbide papers (from the 120 or 220 grit to the 1200 or the 2400): the grinding removes the saw damage and flattens the surface: the finer the grinding, the cleaner the polish;
- The polishing: the final polishing on the cloths with the diamond suspensions (6, 3 and 1 micrometers): the polish is complete when the surface is free of the scratches under the low magnification: the polish quality decides the phase contrast: the polished surface is the mirror of the clinker;
- The etching: the chemical treatment that reveals the phases: the water etch reveals the free lime (the hydration halo), the nital (the nitric acid in the alcohol) etches the alite and the belite differently, and the ethylene glycol or the special reagents distinguish the sulfates and the aluminates: the etchant is the developing bath of the microstructure;
- The storage of the specimens: the polished sections degrade with the hydration and the moisture: the specimens are stored dry in the desiccator and re-polished before the re-examination: the section is the perishable document of the clinker;
The preparation is the ritual of the microscopy: the grinding and the polishing remove the surface damage layer by layer, and the etching develops the phases that the polish hid: the poorly prepared section lies to the microscopist: the scratches mimic the grain boundaries, the relief imitates the phases and the artifacts confuse the counting: the laboratory that masters the preparation masters the examination: the polished section is the ground truth of the clinker, prepared with the patience of a jeweler.
3. The Microscope and the Illumination: The Reflected Light Examination
The clinker phases are examined with the reflected light microscope: the light is directed onto the polished surface and the reflected light builds the image: the contrast of the phases is the language of the image:
- The reflected light microscope: the metallurgical microscope with the vertical illumination: the light passes the objective, reflects off the polished surface and returns through the objective to the eyepiece or the camera: the reflected light sees the surface, and the surface is the polish;
- The magnifications: the 100 to 200 times for the overview and the counting, the 400 to 500 times for the phase details and the 1000 times (with the oil immersion) for the finest structures: the magnification ladder matches the question: the overview for the texture, the immersion for the alite rims;
- The bright-field illumination: the standard mode: the phases appear in their natural reflectivity and color: the alite bright, the belite darker, the ferrite bright with the brown tone, the aluminate dark: the reflectivity and the color are the first identification keys;
- The crossed polarizers: the polarizing filters reveal the anisotropic phases: the alite and the belite show the polarization colors, the aluminate and the ferrite appear as the dark (isotropic or weakly birefringent) phases: the crossed polars separate the silicates from the interstitial phases;
- The fluorescence and the specialized illumination: the ultraviolet fluorescence of the hydrating lime, the special filters for the alkali phases: the specialized techniques serve the specific questions: the standard white light carries the daily work;
- The image capture and the analysis: the digital camera and the image analysis software: the images archived, the phases measured by the software: the modern laboratory combines the eye and the pixel: the image is the evidence of the report;
The microscope is the instrument of the contrast: the clinker phases announce themselves through the colors and the brightness of the reflected light: the alite in the gray and the belite in the ochre, the ferrite in the bright brown and the aluminate in the dark wedge: the microscopist learns the palette of the phases as the painter learns the palette of the pigments: the illumination modes add the dimensions of the polarization and the fluorescence: the instrument is simple, and the reading is the skill: the microscope opens the window, and the training opens the eye.
4. The Alite: The Principal Phase and the Morphology
The alite (the tricalcium silicate, C3S) is the phase that gives the cement its early strength, and its morphology is the diary of the burning:
- The appearance: the alite appears as the gray, well-formed hexagonal crystals under the reflected light: the typical alite of the industrial clinker is 20 to 60 micrometers in size: the well-burned clinker shows the euhedral (well-formed) alite with the straight sides and the sharp corners;
- The well-burned morphologies: the hexagonal plates and the prismatic crystals of the normal, well-burning clinker: the sharp edges and the clean facets speak of the adequate temperature and the residence time: the well-formed alite is the signature of the controlled burning;
- The rounded and the ragged alite: the rounded corners and the pitted surfaces of the alite indicate the thermal stress or the chemical attack in the burning zone: the rounded alite follows the over-burning or the alkali-rich chemistry: the condition of the alite edges is the thermometer of the zone;
- The bloated alite: the large (100 micrometers plus), rounded alite with the internal holes and the porous structure: the bloating follows the excessive temperature or the reducing conditions: the bloated alite preserves the strength poorly and signals the hot, reducing kiln operation;
- The alite rims: the thin zones at the edges of the alite crystals with the different composition: the rims record the late-stage reactions with the melt: the rim structures are studied at the high magnification and in the polarized light: the rims are the fine print of the burning;
- The alite nests and the clusters: the groups of the alite crystals fused together: the clusters follow the coarse raw mix particles or the local melt concentrations: the distribution of the alite across the section speaks of the homogenization of the raw meal;
The alite is the leading actor of the clinker microstructure: its form tells the burning story frame by frame: the sharp hexagons of the perfect burning, the rounded corners of the stress, the bloated giants of the over-firing and the nests of the inhomogeneous feed: the microscopist reads the alite as the kiln operator wishes he could see his flame: the size and the shape of the alite are the crystallization of the kiln’s temperament: the phase that gives the strength is the phase that records the process: the alite is the witness.
5. The Belite: The Forms and the Interpretations
The belite (the dicalcium silicate, C2S) is the second silicate phase of the clinker: it contributes the late strength, and its forms are the richest vocabulary of the microscopy:
- The appearance: the belite appears as the rounded, ochre to brown crystals with the characteristic internal lamellar structure: the belite of 20 to 40 micrometers shows the striations and the twinning that give it the fingerprint look: the belite is the most easily recognized phase of the clinker;
- The alpha, the beta and the gamma forms: the high-temperature forms of the belite with the different structures and the different stabilities: the beta-belite is the reactive form of the cement, the gamma-belite is the inert, dusting form: the microscopy (with the etching and the polarization) identifies the forms and their shares;
- The well-formed belite: the rounded, smooth crystals with the clear lamellar texture of the slow, well-crystallized belite: the well-formed belite follows the adequate time at the high temperatures: the smooth belite is the sign of the mature burning;
- The ragged and the diffuse belite: the irregular, porous belite with the blurred lamellae: the ragged belite follows the fast burning or the rapid cooling: the condition of the belite surface and the lamellae records the cooling rate of the clinker;
- The belite nests and the clusters: the large aggregates of the belite in the clinker: the nests follow the coarse silica grains of the raw mix that reacted incompletely: the belite nests are the silent witnesses of the raw material oversize: the nest density is the homogenization report of the raw mill;
- The alite-belite relationship: the balanced clinker shows the alite and the belite in the ratio expected from the chemistry: the alite growing at the expense of the belite in the hot burning, the belite dominating in the cool one: the alite-belite balance is the phase mirror of the lime saturation factor;
The belite is the second voice of the clinker: its rounded, lamellar forms speak of the time and the temperature as clearly as the alite: the smooth, well-formed belite says the kiln was patient; the ragged, diffuse belite says the cooler was hasty; the nests say the silica was coarse: the microscopist reads the belite forms and translates them into the process terms: the belite is the phase of the late strength, and its examination is the microscope’s lesson in the history of the burning: the quiet phase with the loud story.
6. The Interstitial Phases: The Aluminate and the Ferrite
Between the silicate crystals lies the interstitial material: the aluminate (C3A) and the ferrite (C4AF) that filled the melt at the burning temperature: the interstitial phases are the matrix of the clinker and the home of the minor elements:
- The aluminate (C3A): the dark, isotropic phase with the prismatic or the dendritic forms: the aluminate appears dark between the crossed polars: the fine, well-dispersed aluminate follows the fast cooling: the coarse, prismic aluminate follows the slow cooling and the high alumina;
- The ferrite (C4AF): the bright, anisotropic phase with the brown reflectivity: the ferrite appears bright between the crossed polars: the ferrite carries the iron and the magnesium and varies with the alumina ratio: the ferrite brightness and the zoning reflect the local chemistry;
- The morphology of the interstitial material: the fine eutectic mixtures, the dendritic growths and the glassy areas: the fast-cooled clinker shows the fine, dark, glassy interstitial matrix; the slow-cooled one the coarse crystalline prisms: the interstitial morphology is the cooling speedometer of the clinker;
- The melt distribution: the interstitial phase should surround the alite in the thin, continuous films: the even distribution of the melt binds the alite and the belite into the coherent clinker: the uneven, lumped interstitial phase speaks of the poor melt distribution and the coarse liquid concentrations;
- The alkali and the minor element loading: the alkalis and the magnesium enter the interstitial phases: the aluminate and the ferrite absorb the potassium, the sodium, the titanium and the phosphorus: the interstitial composition is the sink of the minor chemistry of the clinker;
- The reduction staining: the reducing conditions reduce the ferric iron to the ferrous and darken the interstitial phase: the “reduced ferrite” appears brown to black in the reflected light: the reduction staining is the visual alarm of the reducing kiln operation: the darkest interstitial phase is the loudest warning of the section;
The interstitial phases are the cement of the clinker: the aluminate and the ferrite hold the silicates together, carry the minor elements and record the cooling rate: the fine, dark matrix of the fast-cooled clinker and the coarse prisms of the slow-cooled one are the two photographs of the same cooler: the microscopist reads the interstitial morphology and tells the plant whether its cooling protects the reactivity: the matrix of the clinker is the memory of the melt: the phases between the crystals are the phases that decide the setting, the color and the heat of the cement.
7. The Free Lime and the Periclase: The Unsound Phases
The examination watches for the two phases that threaten the soundness of the cement: the free lime and the periclase (the free magnesia):
- The free lime (CaO): the uncombined lime of the clinker: the hard, rounded, isotropic grains distributed in the section: the free lime hydrates slowly in the set cement and expands late: the soundness risk of the cement rises with the free lime above the normal levels: the microscopy locates the lime and the chemistry quantifies it;
- The distribution of the free lime: the scattered fine lime grains vs the concentrated clusters: the clusters around the coarse limestone particles of the raw mix: the distribution tells whether the free lime is the chemistry problem or the fineness problem: the location of the lime is the diagnosis of the cause;
- The hydration halo: the water etch reveals the free lime by the hydration halo that forms on the wetted surface: the etched lime grains show the dark hydration rims: the etch test is the quick confirmation of the free lime at the microscope;
- The periclase (MgO): the crystalline free magnesia: the periclase appears as the rounded, bright, isotropic grains, often associated with the ferrite: the periclase hydrates very slowly and expands in the mature concrete: the high magnesia raw materials risk the periclase content: the microscopy quantifies the periclase that the Bogue chemistry hides;
- The soundness assessment: the combination of the free lime and the periclase with the autoclave test of the cement: the microscopy explains the autoclave failures: the large periclase crystals and the high free lime are the two faces of the unsound cement;
- The prevention information: the lime burning history, the magnesia distribution and the cooling conditions: the examination guides the kiln (the temperature, the mixing) and the raw mix (the magnesia limits): the prevention of the unsoundness starts at the microscope;
The free lime and the periclase are the dangerous minorities of the clinker: the slow hydration of the two phases in the mature concrete is the delayed expansion that cracks the structures: the microscope is the scout that finds them: the hydrated halo of the lime and the bright grains of the periclase are the warning flags of the section: the plant that examines its clinker knows its unsoundness before the autoclave test complains: the examination of the dangerous phases is the examination of the future of the concrete: the two minorities, watched with the major attention.
8. The Point Counting: The Quantitative Microscopy
The microscopy becomes a quantitative discipline through the point counting: the systematic sampling of the section converts the visual impression into the phase percentages:
- The principle of the point counting: the specimen is moved under the microscope in the regular grid steps, and the phase under the crosshair at each point is recorded: the phase volume fraction equals the fraction of the counted points: the statistics of the random sampling, applied to the clinker section;
- The counting procedure: the automatic stage moves the section in the fixed increments, the operator (or the image analyzer) records the phase at each point: the counts of 1000 to 2000 points per specimen give the phase percentages with the acceptable precision: the counting is the discipline of the patience;
- The phase classification: the standard categories: the alite, the belite, the aluminate, the ferrite, the free lime, the periclase, the sulfate and the voids: the classification scheme is agreed before the counting: the consistent classification is the comparability of the reports;
- The statistics and the errors: the counting error follows the square root of the point number: the 2000 points give the errors of about 1% for the major phases: the minor phases need the dedicated counting at the higher magnifications: the error bars are the honesty of the percentage;
- The comparison with the Bogue calculation: the microscopical phase composition vs the calculated Bogue composition: the differences reveal the deviations of the actual phases from the assumed pure ones: the alite content measured vs the C3S by the Bogue is the classic reconciliation of the laboratory;
- The image analysis automation: the digital images and the software classifiers count the phases automatically: the automated counting is faster and consistent, at the price of the careful training of the classifier: the modern laboratory blends the human judgement and the software statistics;
The point counting is the microscope’s arithmetic: the visual image becomes the percentage, and the percentage becomes the report: the alite of 55 to 65% by the counting against the C3S of the Bogue table is the reality check of both methods: the counting is the statistical discipline of the examination: the 1000 points and the squared-root errors are the grammar of the quantitative microscopy: the phase percentages of the clinker, counted point by point, are the numbers the kiln and the laboratory can argue about and agree on.
9. The Burning History in the Texture: The Interpretation
The texture of the clinker section is the condensed history of the burning and the cooling: the interpretation of the texture is the most valuable skill of the microscopist:
- The normal well-burned clinker: the euhedral alite of 20 to 60 micrometers, the rounded lamellar belite, the fine interstitial matrix: the texture of the balanced burning and the fast cooling: the reference image of the healthy clinker;
- The over-burned (hard-burned) clinker: the large, bloated alite with the rounded edges, the coarse interstitial prisms, the reduced porosity: the over-burning follows the excessive zone temperature: the hard-burned clinker grinds hard and reacts slowly: the texture of the wasted fuel;
- The under-burned (soft-burned) clinker: the ragged alite with the serrated edges, the abundant belite nests, the high free lime: the under-burning follows the cool zone or the short residence: the soft-burned clinker carries the unsound lime and the poor strength: the texture of the hungry fire;
- The reducing clinker: the darkened, brown interstitial ferrite, the bloated alite and the iron sulfide specks: the reducing texture follows the oxygen-starved burning: the reducing clinker risks the false set and the volume instability: the texture of the oxygen debt;
- The slow-cooled clinker: the coarse interstitial crystallization, the secondary belite growth at the alite edges and the periclase growth: the slow cooling follows the poor cooler performance: the slow-cooled texture loses the reactivity of the alite and the aluminate: the texture of the heat retained too long;
- The alkali and the sulfate textures: the coating of the alite with the alkali sulfates, the late-stage sulfate films and the potassium concentration: the alkali textures follow the cycles and the fuel chemistry: the sulfate distribution decides the cement-setting compatibility: the texture of the minor chemistry;
The interpretation of the texture is the translation of the image into the process: the microscopist sees the bloated alite and says the zone ran hot; the ragged alite with the lime clusters and says the raw meal was coarse; the darkened ferrite and says the oxygen was short: the texture is the photograph of the burning, and the interpretation is the narrative: the good report tells the kiln what it did, when it did it and what the consequence will be in the cement: the texture is the history, and the interpretation is the lesson.
10. The Sulfates and the Alkalis in the Clinker: The Setting Chemistry
The sulfate and the alkali phases of the clinker are the small but decisive components of the cement behavior: their microscopical study serves the setting and the strength compatibility:
- The alkali sulfate phases: the potassium sulfate (arcanite), the calcium langbeinite and the sodium sulfates: the sulfates appear as the small, bright or dark crystals in the interstitial phase: the form of the sulfate (the crystal size, the association with the aluminate) depends on the cooling rate and the composition;
- The sulfate-aluminate interplay: the sulfate in the clinker moderates the C3A reactivity in the cement: the alkali sulfates stabilize the aluminate and reduce the flash set tendency: the amount and the form of the sulfate decide the gypsum demand of the cement: the microscopy explains why the same SO3 behaves differently in the different clinkers;
- The potassium distribution: the potassium prefers the sulfate and the aluminate phases: the potassium-rich zones appear as the late-crystallized interstitial patches: the distribution of the potassium between the sulfate and the aluminate follows the sulfate availability: the K2O to SO3 ratio is the master of the distribution;
- The sodium and the minor alkalis: the sodium enters the aluminate and the ferrite solid solutions: the sodium-rich phases modify the reactivity and the color: the minor alkali accounting completes the chemical story of the section;
- The chloride and the phosphate phases: the chloride phases in the waste-fired clinkers and the phosphate phases in the phosphate-rich raw materials: the exotic phases appear under the special conditions: the examination identifies them for the trouble-shooting of the unusual chemistry;
- The link to the cement performance: the setting time, the false set and the early strength of the cement follow the sulfate chemistry of the clinker: the microscopical examination of the clinker, combined with the SO3 and the alkali analysis, predicts the cement behavior before the mill: the section is the pre-analysis of the product;
The sulfate and the alkali phases are the seasoning of the clinker: the small shares that decide the setting, the false set and the gypsum demand: the microscopy locates the sulfate in the structure: the alkali sulfate crystals, the sulfate rims and the aluminate-sulfate associations are the maps of the compatibility: the plant that examines the sulfate distribution understands why its cement behaves as it does: the minor phases of the section are the major factors of the product: the seasoning, examined with the same care as the main course.
11. The Microscopy in the Troubleshooting: The Table of the Findings
The microscopical examination earns its keep in the investigations of the cement failures: the table below collects the classical findings and their process conclusions:
| Microscopical finding | Typical process cause | Consequence for the cement |
|---|---|---|
| Bloated alite with the dark interstitial | Hot, reducing burning | Slow strength, false set risk |
| Ragged alite + free lime clusters | Coarse raw meal, short burning | Unsound, low early strength |
| Coarse interstitial prisms | Slow cooling in the cooler | Reactivity loss, high SO3 demand |
| Large periclase grains | High MgO raw material | Delayed expansion risk |
| Belite nests, low alite | Low LSF, coarse silica | Slow strength development |
| Alkali sulfate rims on alite | High alkali cycles | Setting and sulfate compatibility issues |
The troubleshooting table is the cheat sheet of the investigation: the finding on the left and the process on the right: the cement complaint of the customer (the setting, the strength, the soundness) is traced to the clinker, the clinker to the section and the section to the kiln: the microscopy is the middle of the chain of the diagnosis: the plant that examines its suspect products knows the cause of the complaint in days, not in the months of the blind experiments: the table is the beginning of the wisdom, and the experience is its continuation.
12. The Reporting and the Integration with the Quality Control
The microscopical examination is a laboratory discipline with the discipline of the reporting: the section without the report is the picture without the caption, and the report without the numbers is the opinion without the evidence:
- The standard report structure: the sample identification, the preparation details, the phase percentages by the point counting, the textual description and the conclusions: the structure makes the reports comparable across the years and the laboratories: the standard report is the common language of the discipline;
- The photomicrographs: the images of the characteristic fields at the standard magnifications: the images with the scale bars and the annotations: the photograph is the evidence that the description claims: the archive of the photographs is the memory of the clinker history;
- The comparison with the target: the measured phases vs the expected from the Bogue and the process targets: the deviations flagged and the trends watched: the phase report is the quality control of the burning in the phase language;
- The frequency of the examinations: the daily or the weekly routine for the burning control, the as-needed examinations for the complaints and the campaigns for the raw material changes: the frequency follows the value of the information: the routine examination is the stethoscope of the kiln;
- The integration with the chemistry: the microscopy report combined with the XRF, the free lime and the XRD data: the composite picture of the clinker quality: the laboratory that integrates its instruments speaks with the one voice: the microscope, the diffractometer and the spectrometer, the three witnesses of the same sample;
- The training of the examiners: the identification skills are learned on the reference sections and the sets of the annotated images: the trained examiner is the asset of the laboratory: the training of the microscopists is the investment in the interpretation quality;
The report is the currency of the examination: the phase percentages, the textures and the conclusions pass from the laboratory to the kiln and the quality department: the integration with the chemical control turns the microscope from the curiosity into the instrument: the plant that runs the routine examinations builds the database of its clinker signatures: the normal textures of its own product, the excursions of its disturbances and the remedies of its corrections: the report archive is the cumulative wisdom of the burning: the microscopy, integrated, is the institutional memory of the clinker quality.
13. The Frequently Asked Questions
Why examine the clinker under the microscope when the chemistry analysis exists?
Because the chemistry says what is present and the microscope says how it was made: the same oxide composition can produce a well-burned, fast-cooled clinker or a poorly burned, slow-cooled one: the microstructure decides the cement behavior: the microscopy complements the chemical analysis with the burning history that the oxides cannot tell.
How long does the clinker examination take?
The preparation of the polished section takes 30 to 60 minutes including the grinding, the polishing and the etching: the examination and the point counting of 1000 to 2000 points take another 30 to 60 minutes: a trained laboratory delivers the complete report within a few hours of the sample arrival: the microscopy is fast enough for the routine and the troubleshooting.
What is the difference between the alite and the belite in the image?
The alite appears as the gray, angular, well-formed hexagonal crystals with the sharp edges, while the belite appears as the rounded, brown-yellow crystals with the internal lamellar striations: the contrast of the color, the shape and the texture separates the two silicates at a glance: the polarization clarifies the borderline cases.
How is the free lime observed under the microscope?
The free lime appears as the rounded, isotropic, hard grains, often concentrated in the clusters: the water etch confirms it by the formation of the dark hydration halo around the grains: the point counting quantifies it: the microscopy locates the lime in the structure, which the titration of the free lime cannot.
Can the microscopy detect the reducing burning?
Yes: the reducing conditions darken the ferrite interstitial phase and cause the bloated alite: the “reduced” clinker shows the characteristic brown-black interstitial staining: the microscopy is the most direct confirmation of the reducing operation, complementing the gas analysis of the kiln exit.
Is the point counting still relevant with the modern laboratory instruments?
The image analysis software automates the counting, and the point counting remains the validated reference: the phase percentages by the microscopy are the ground truth that the Bogue calculations approximate: the modern laboratory uses both: the software for the speed and the counting method for the calibration: the quantitative microscopy is alive and well in the quality control.
14. Conclusion
The microscopical examination of the clinker and the cement: the window into the microstructure: the polished section, the etchants and the reflected light reveal the alite, the belite, the interstitial phases, the free lime and the periclase: the point counting quantifies and the interpretation diagnoses: the burning history, the cooling rate, the reducing conditions and the alkali chemistry are all written in the crystals: the microscope is the diagnostic instrument of the clinker quality, the complement of the chemistry and the witness of the kiln: the plant that looks into its product knows the past of its burning and the future of its cement.
The Complete Cement Technical Package includes the microscopy documentation with the sample preparation guides, the phase identification charts, the point counting methods and the interpretation tables: the one-time price of $249.99: the instant download: the library of the microstructure: the engineer and the laboratory of the package read the clinker section as the professional text: the phases, the textures and the stories: the microscopical examination, mastered with the full documentation.
Get this microscopy guide + the full 931-file package
$249.99 — one-time purchase, instant download, lifetime access
This file is part of the Complete Cement Technical Package (931 files) available from cementequipment.org. Respective rights holders; library copy for the licensed single user.