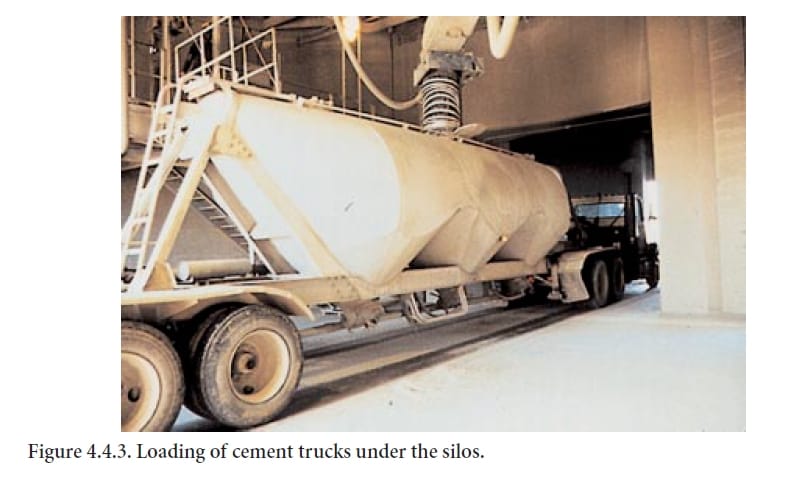
Visible dust around a cement truck loading spout is usually a containment problem, an extraction problem, or both. Start by recording where dust first escapes, confirm that the spout outlet is centered and sealed to the truck hatch, verify extraction airflow and filter condition, then inspect telescopic cones, fabric sleeves, cables, seals and material fall height. Do not compensate for a bad mechanical seal by simply increasing suction; excessive extraction can disturb loading and still fail to capture dust escaping through a large opening.
Stop cement dust escaping during tanker or truck loading without slowing the loadout or creating repeated spout damage.
Observe escape location, hatch fit, extraction pressure/airflow indication, filter differential pressure, pulse-cleaning state, spout position and loading sequence.
Separate seal/positioning faults, extraction/filter faults, mechanical damage and operating-sequence problems before adjusting airflow or replacing the spout.
Fast diagnostic order
- Identify exactly where dust escapes during loading: spout inlet, telescopic sections, truck interface, or extraction connection.
- Compare extraction airflow, loading rate, and spout position with the normal clean-loading condition.
- Inspect skirts, seals, flexible sections, internal cone condition, and material buildup.
- Check the dust collector, duct restriction, fan condition, and filter differential pressure.
- After correction, run a representative loading cycle and verify visibly cleaner loading with stable extraction.
Capture the dust pattern before changing anything
Record: truck type and hatch geometry; spout position relative to the hatch; whether the outlet skirt or cone fully contacts the hatch; material feed rate; extraction fan status; filter differential pressure or equivalent condition indication; pulse-cleaning status; dust escape location and timing; telescopic travel; cable tension; visible cone, sleeve or seal damage; and whether the dust starts immediately or only as the truck fills.
A short video from a safe observation point is often valuable because the first visible dust plume can identify whether the leak starts at the outlet seal, upper telescopic section, extraction connection or truck hatch.
1. Confirm the spout is centered and mechanically sealed to the hatch
Containment begins at the interface between the loading spout and the receiving vehicle. If the outlet is offset, tilted or only partly seated, dust-laden displaced air takes the easiest path out of the hatch. Check the truck stop position, spout positioner travel and operator sequence. Inspect the outlet skirt, cone or sealing ring for cuts, hardening, deformation and cement buildup that prevents full contact. A clean extraction system cannot reliably compensate for a large open gap around the hatch.
2. Verify dust extraction from the spout to the collector
Check that the extraction fan is running, dampers are in their normal positions and ducting is open. Inspect flexible extraction hoses for collapse, abrasion holes and internal buildup. Where the plant has airflow, static-pressure or fan-current baselines, compare current readings under the same loading condition. Loss of extraction at the spout can be caused by a dirty filter, blocked duct, failed fan, closed damper or leakage upstream of the pickup point.
3. Inspect the filter and pulse-cleaning system
A dust collector with overloaded elements or ineffective pulse cleaning gradually loses useful airflow. Review differential-pressure trend rather than one isolated reading. Confirm compressed-air supply to the pulse system, solenoid/diaphragm operation, timer or controller status and hopper discharge. A full dust hopper can re-entrain dust or obstruct filter operation. If the filter has recently been serviced, verify that doors, gaskets and clean-air connections are sealed correctly.
4. Inspect the telescopic spout for leakage paths
Extend and retract the spout through its normal travel and look for torn outer sleeves, cracked cones, missing bands, loose clamps, damaged cable routing or sections that telescope unevenly. Cement can accumulate inside cones and sleeves; when the spout moves, this stored material may fall externally and look like an extraction failure. Clean the assembly and identify whether the dust is airborne from the active load or simply shedding from accumulated material.
5. Control fall height and filling sequence
The loading spout should remain appropriately positioned as the vehicle fills. Excessive free fall creates a stronger dust cloud and increases the amount of displaced air that the extraction system must handle. If the spout is raised too early, cement can rain through a larger open volume and dust can escape before it reaches the pickup zone. Verify level indication, operator sequence and automatic raise/lower logic where fitted.
6. Check whether the receiving vehicle is creating abnormal back pressure
A blocked or unsuitable truck vent path can force displaced air back around the hatch. Compare the problem between different trucks. If one vehicle type repeatedly produces dust while others remain clean, inspect hatch geometry and venting compatibility before modifying the plant extraction system. Do not treat every vehicle-side restriction as a spout failure.
Dust-leakage diagnostic matrix
| Observed pattern | Likely direction | Priority check |
|---|---|---|
| Dust escapes around hatch immediately | Poor outlet seal / positioning | Centering, skirt/cone condition, hatch geometry |
| Dust increases progressively through a loading cycle | Filter loading or vehicle venting limitation | DP trend, pulse cleaning, truck vent path |
| Dust leaks from upper telescopic section | Sleeve/cone/mechanical damage | Sleeves, clamps, cones, alignment and cable travel |
| Dust appears when spout is raised/lowered | Internal buildup shedding | Clean inner cones/sleeves; inspect material retention points |
| Only certain trucks create the problem | Vehicle interface / hatch / vent mismatch | Compare hatch size, sealing contact and venting |
Common mistakes
- Increasing extraction without checking the hatch seal.
- Replacing filter elements without checking pulse cleaning and hopper discharge.
- Calling all falling dust a filter problem when cement is actually stored inside the telescopic cones.
- Ignoring truck-to-truck differences in hatch geometry and venting.
- Running the spout at an angle or excessive free-fall distance, which increases wear and dust generation.
Return-to-service acceptance checklist
Verify the repair during a representative full loading cycle, not during an empty mechanical test.
- The spout stays centered and sealed throughout loading.
- No sustained visible dust plume escapes from the hatch or telescopic assembly.
- Extraction and filter indicators remain inside the plant’s established healthy range.
- The spout raises and retracts without abnormal rubbing or stored-material shedding.
- The clean-loading result is repeatable with more than one typical vehicle when practical.
Frequently asked troubleshooting questions
Why does dust escape even when the loading-spout fan is running?
Fan operation does not prove effective capture. Check the spout-to-hatch seal, extraction airflow, filter differential pressure, duct restriction and leakage in the telescopic sections.
Can increasing extraction airflow solve a bad hatch seal?
Usually not. A large mechanical gap can overwhelm the pickup zone and excessive suction can disturb loading. Restore centering and sealing first, then verify the extraction system.
Why does dust appear mainly when the spout moves?
Material can accumulate inside telescopic cones or sleeves and shed during extension or retraction. Clean the assembly and distinguish stored material from active airborne leakage.
Related Infinity technical guides
References
Vortex Global technical articles on telescoping loading spouts, dust retrieval and filtration systems, including cement-terminal applications. Final airflow, filter and mechanical limits should follow the installed loading-spout and dust-collector OEM documentation.